Thursday, 24 May 2018

Using Socrative as a tool for AfL (Assessment for Learning)

Using Socrative as a tool for AfL (Assessment for Learning)

In our external scan of ICT tools, we are on a constant lookout for those which enable teachers to carry out AfL (Assessment for Learning) effectively, meaning teachers can use them to:
  •  design effective tasks that elicit evidence of learning
  •  provide students with feedback that moves their learning forward
 

According to the MOE Assessment Philosophy, assessment is integral to the learning process and should be carried out continuously, motivating learners and helping them to achieve the desired outcomes.

With the emphasis on AfL, how is it possible to carry out regular, quick and effective checks on students’ understanding of your lessons?

Many of us have used Kahoot as a formative assessment tool in our classroom and to gamify our assessment process. However, it only allows students to complete multiple-choice questions and the time taken to complete the questions is an important factor in achieving high scores.

This time round, we are introducing Socrative, another online tool but with a different take on how AfL should be like. It enables teachers to set a variety of question types, as well as giving students immediate feedback on their performance for each question.

Here are some reasons why you would want to try out Socrative.

A) Create easily:
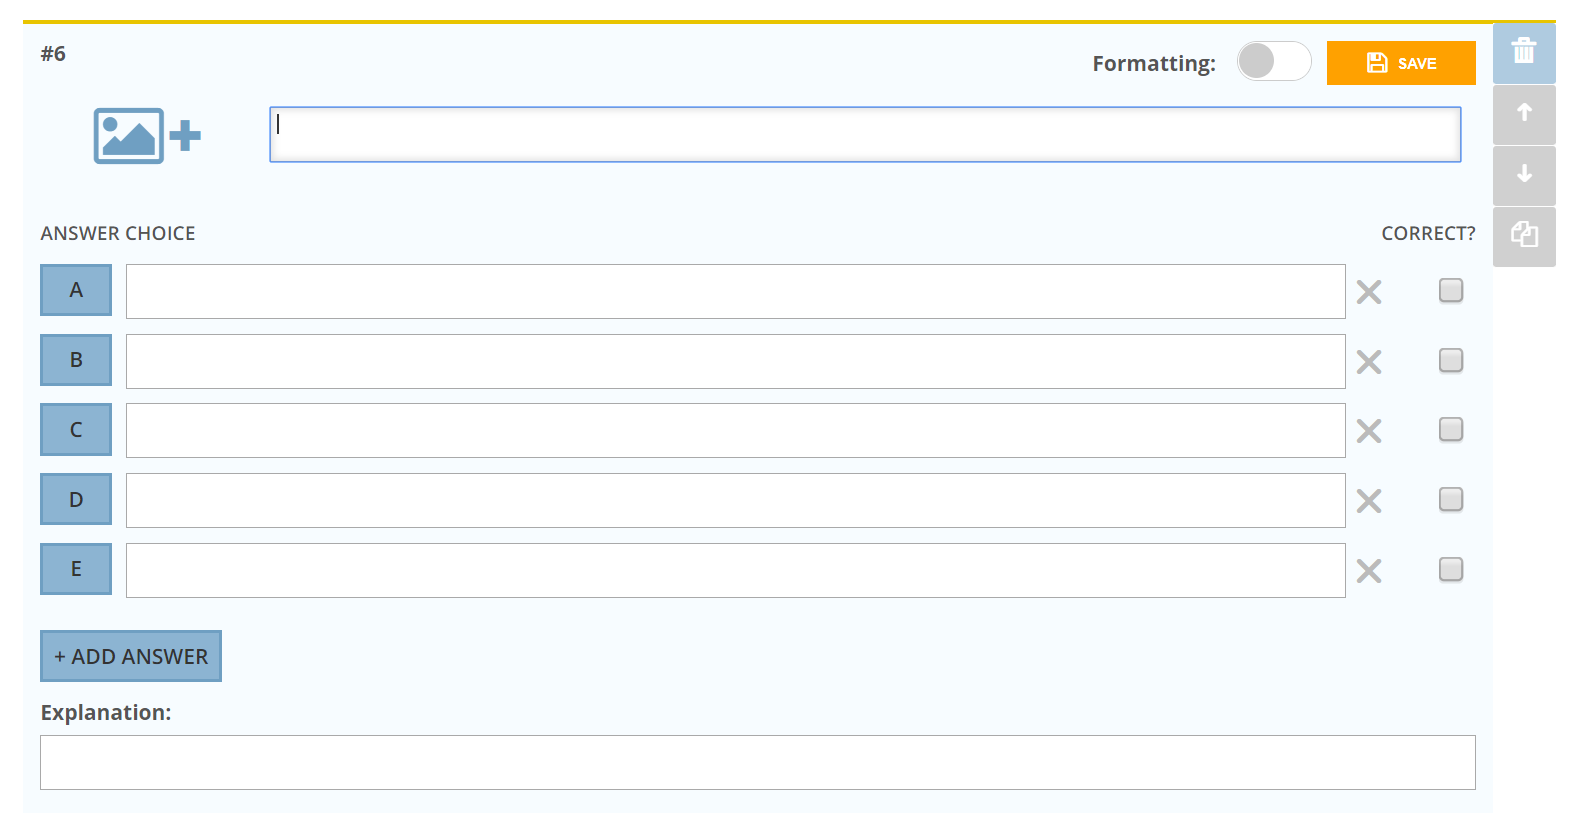
Creating your quizzes on Socrative is a breeze. The interface is user friendly and creating a quiz is fast.

Teacher’s screen: Creating a new quiz.
                                                
Teacher’s screen: Creating a new MCQ.

B) What else can I expect besides MCQs?
Besides MCQs, you can also add 2 other types of quiz questions to check on your students’ understanding.
True/False and short answer questions varies the responses required from the students.


Teacher’s screen: True/False and short answer questions

C) Join spontaneously:
Just like the popular Kahoot tool, students need only to key in the room name to access the quiz via their PLDs or smartphones.

Screenshot of students’ mobile phone/ PLD.

Teachers’ screen: launching a quiz in class.


Awaiting students’ responses to the quiz questions.

D) Instant feedback:
Teacher can opt for Instant Feedback which marks students’ answers on the spot and gives the explanation to the correct answer. This allows the teachers to address any areas for improvement immediately, moving the students' learning forward.

 
When the teacher chooses the Instant Feedback option, students will be presented with the correct answer and explanation for each question.

E) Analysis of results:
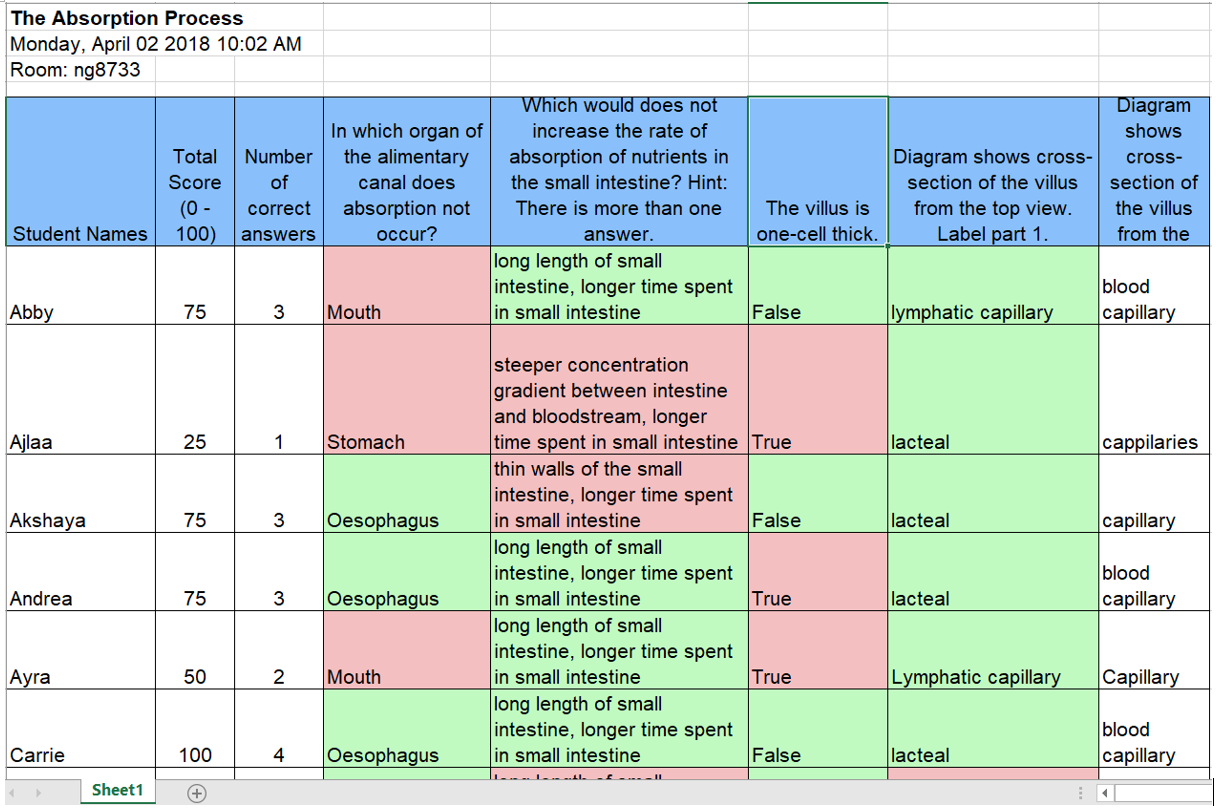
Socrative generates reports showing the performance of the students. Students’ results are summarized, tallied and colour-coded to show weaker areas that the teacher can focus on, adjust their pedagogy and pace of the lesson.  Teachers can choose from a variety of reports, from the performance of the whole class performance to individual students’, or even how well a specific question was done.
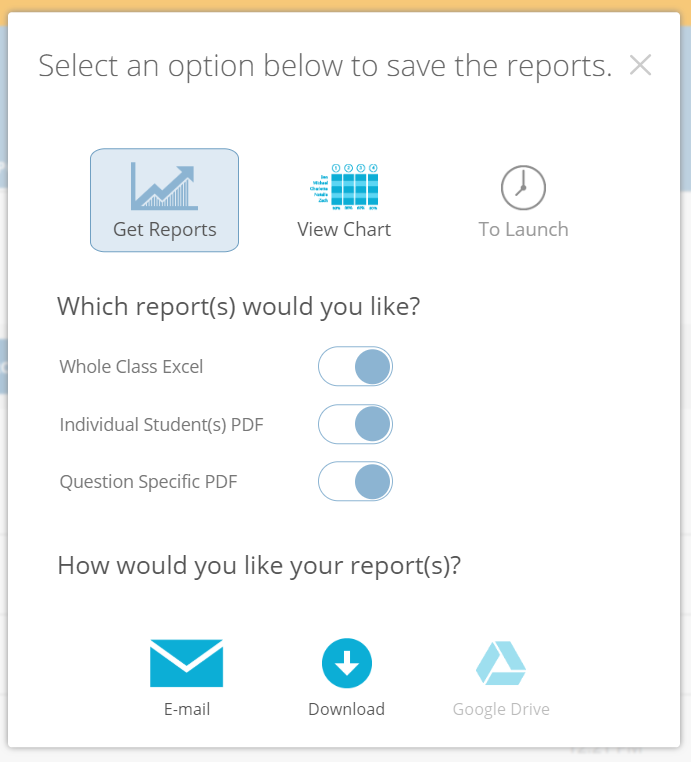
A variety of options for reports to be presented.

Individual students’ response being shown on the teacher’s computer.

PDF report that provides breakdown of how frequent each option was picked/ how well each question was done.

Hope you find this tool useful in carrying out formative assessment for your classes. If you have any questions or feedback please let us know!


Monday, 30 April 2018

Assessment for Learning with Padlet

In carrying out formative assessment, teachers may want to consider trying out Padlet. Padlet is an online bulletin board where users place digital sticky notes. The content of these notes may be in the form of text, web links, uploaded files, images and videos. 

To access Padlet, students may be required to log in or they can be anonymous. Should there be a need to identify students’ notes, instructions may be given to the students to state their name(s) or group number(s) when they are jotting down their stickies. Padlet can be accessed with a link or QR code online via learning platforms such as the new Google Sites or Student Learning Space. Moreover, it is also available as a smartphone app for easy access and bite-sized learning on the go. 

Since we are talking about the new Google Sites, do you know that the new Google Sites has a new feature which allows educators to control who can access and view the content they publish on their Google Sites. This means that teachers can easily create and publish content that can be viewed only by their students or anyone else whom they specify. Also, Google Sites can also be embedded or added on a learning resource on Student Learning Space so this may be something you might wish to consider when designing the learning experience for your students. 


What is ideal about Padlet is that it can be used to activate students’ prior knowledge or to check on students’ current understanding with regards to where they are in their learning. For instance, Padlet was recently used as a form of formative assessment after the students have completed an outdoor fieldwork learning module to gather primary data for their geographical investigation. From the questions posed, the teacher was able to get the students to consolidate what they have learnt, to find out where the learners are in their learning and use the “real time data” to address students’ queries and provide feedback that moves learning forward. Thus, the teacher was able to provide meaningful feedback to review what they need to improve upon in their learning during the students’ subsequent learning in class. This was done face to face in class in response to the students’ reflections. 

STEP 1
Open https://padlet.com and get started. Sign up to get an account. 

STEP 2
Create your padlet by clicking on + MAKE A PADLET


STEP 3
Follow the intuitive instructions to create your padlet. The user-friendly functions on the top right-hand side STEP 3
Follow the intuitive instructions to create your padlet. The user-friendly functions on the top right-hand side allow you to modify the settings of your padlet, customise the design and layout, change the sharing rights and even remake (make a copy).
allow you to modify the settings of your padlet, customise the design and layout, change the sharing rights and even remake (make a copy). 

STEP 4
Once done, then you can share the link or QR code with your students. For this example here, both the link and QR code are embedded in the web site used by the Core Geography students to gather qualitative sensory data and capture their fieldwork reflections. 


Wednesday, 21 February 2018

Formative assessment with Peergrade.com!


As part of the assessment for learning, teachers may want to try out peergrade online platform to help in developing learners’ (students) confidence in peer and self-assessment. These are skills that learners need time and practice in. By using Peergrade platform, learners are able to keep track on their friends’ feedback as and when they want.

STEP 1
 Open https://www.peergrade.io/   and click get started. You may register yourself as a teacher.


STEP 2
Click on ‘teacher’ instead of ‘student’. If your student will be registering for themselves, they will then click ‘students’.


STEP 3
You can choose to sign up via Google account or other account.


STEP 4
Once you have create an account, you may start to create a class.


STEP 5
Click on ‘Use Class Code’ and the system will then generate a code for you. You may give
your students the code and get them to register to join the class.


STEP 6
Once you have created the class, you may begin creating an assignment. You can click
‘create assignment’ on bottom left of the page.
STEP 7
Key in the information required. You can also upload file, image or video to better facilitate
your students understanding on what’s required. 

STEP 8

Create your own rubric. You can copy questions from previous rubrics that you have
created in peergrade or if you are a new user, you may create your own. 

STEP 9
When you create question for the rubrics, you can choose students answer type to be in
text, scale or just yes/no. 

Tick below box appropriately. It will be better to tick that you require students to comment,
so that their feedback will be more explicit. 

Click preview if you want to view all the questions for your rubrics or click next to set the
date of submission and feedback. 

STEP 10
Set the date to your preference. Submission date must be earlier than feedback. Remember to set the time too. Once you are done, click create assignment. 

STEP 11
There will be 5 tabs that will appeared after you are done setting the date and time. Click settings to set the types of submission and/or the number of students to give feedback. 


You can also download all the students’ submission for your reference. 

STEP 12
From the course activities, you will get to see the progress and the allocation of feedback given to individual students. 


All the best in trying!!